.png)
Launching Test Reports Page
-
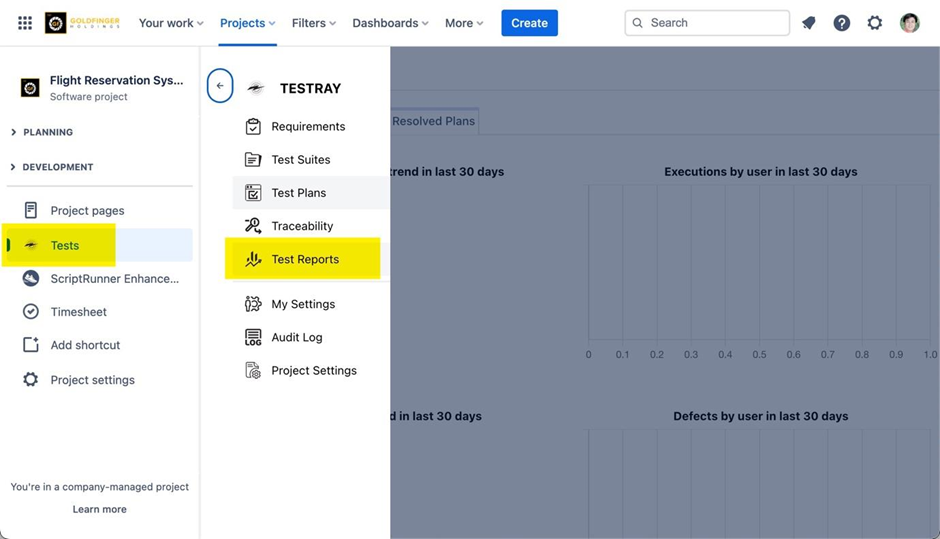
Go to the TestRay home page.
-
Navigate to Tests -> Test Reports.
-
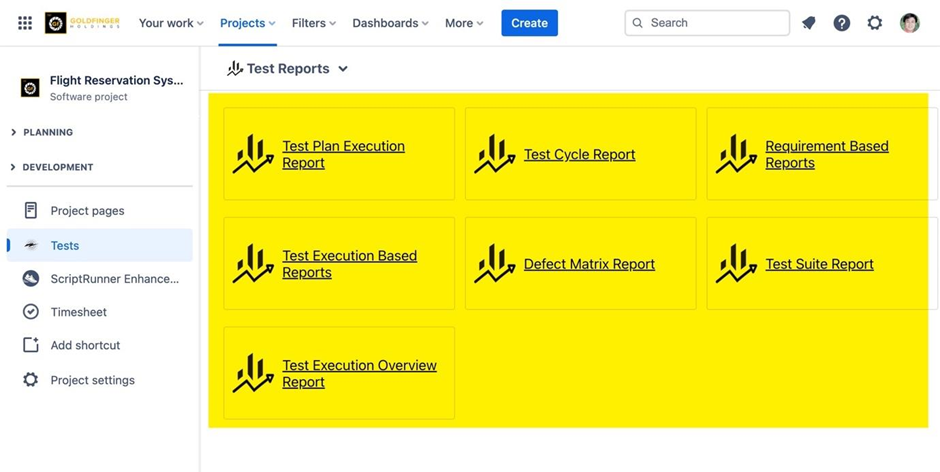
The “Test Reports” page appears with all TestRay pre-defined reports.
Note: You can click the “Report Type” link to generate specific reports.
Configuring Test Report
-
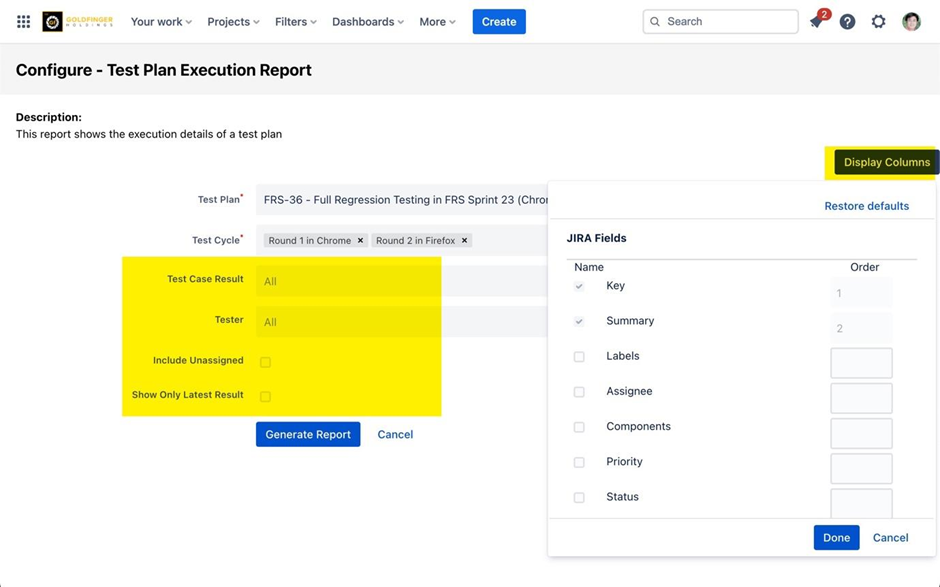
Click “Test Plan Execution Report” link. The “Configure – Test Plan Execution Report” page appears.
-
Choose a Test Plan and Test Cycle/s.
-
Perform further configurations for customizing report:
-
Test Case Result: Only produce report with selected results
-
Tester: Only produce report with selected testers
-
Include Unassigned: Include unassigned test runs
-
Show Only Latest Result: Only show the latest result from each test case
-
Display Columns: Only show the selected fields in report
-
Generating Test Reports
-
Click “Test Plan Execution Report” link. The “Configure – Test Plan Execution Report” page appears.
-
Choose a Test Plan and Test Cycle/s along with other configurations.
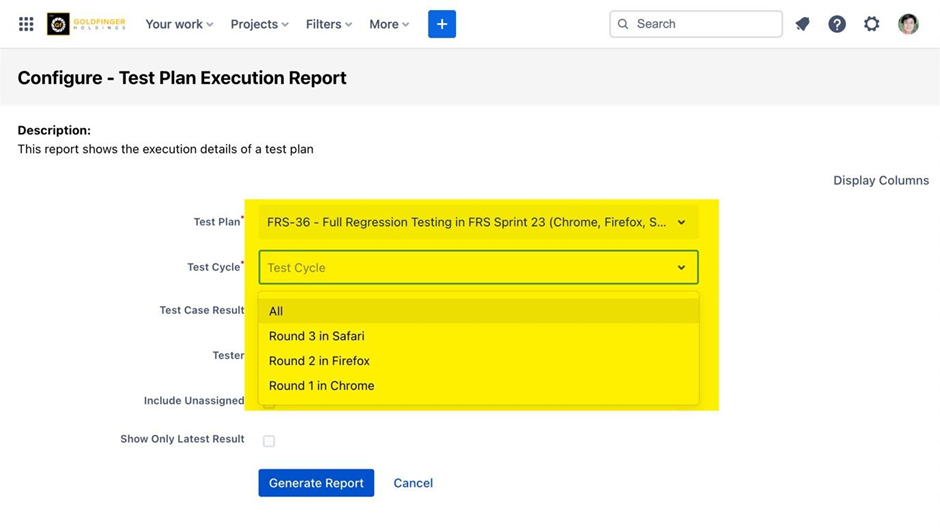
-
Click “Generate Report”. Test Plan Execution Report is generated.
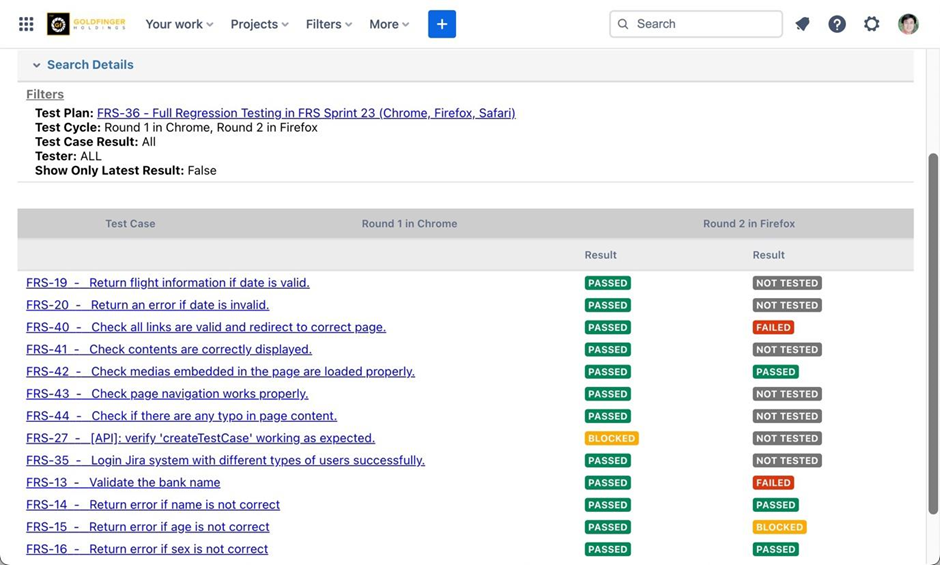
Note: You can follow the same steps to generate data from other reports.
Exporting Test Report
-
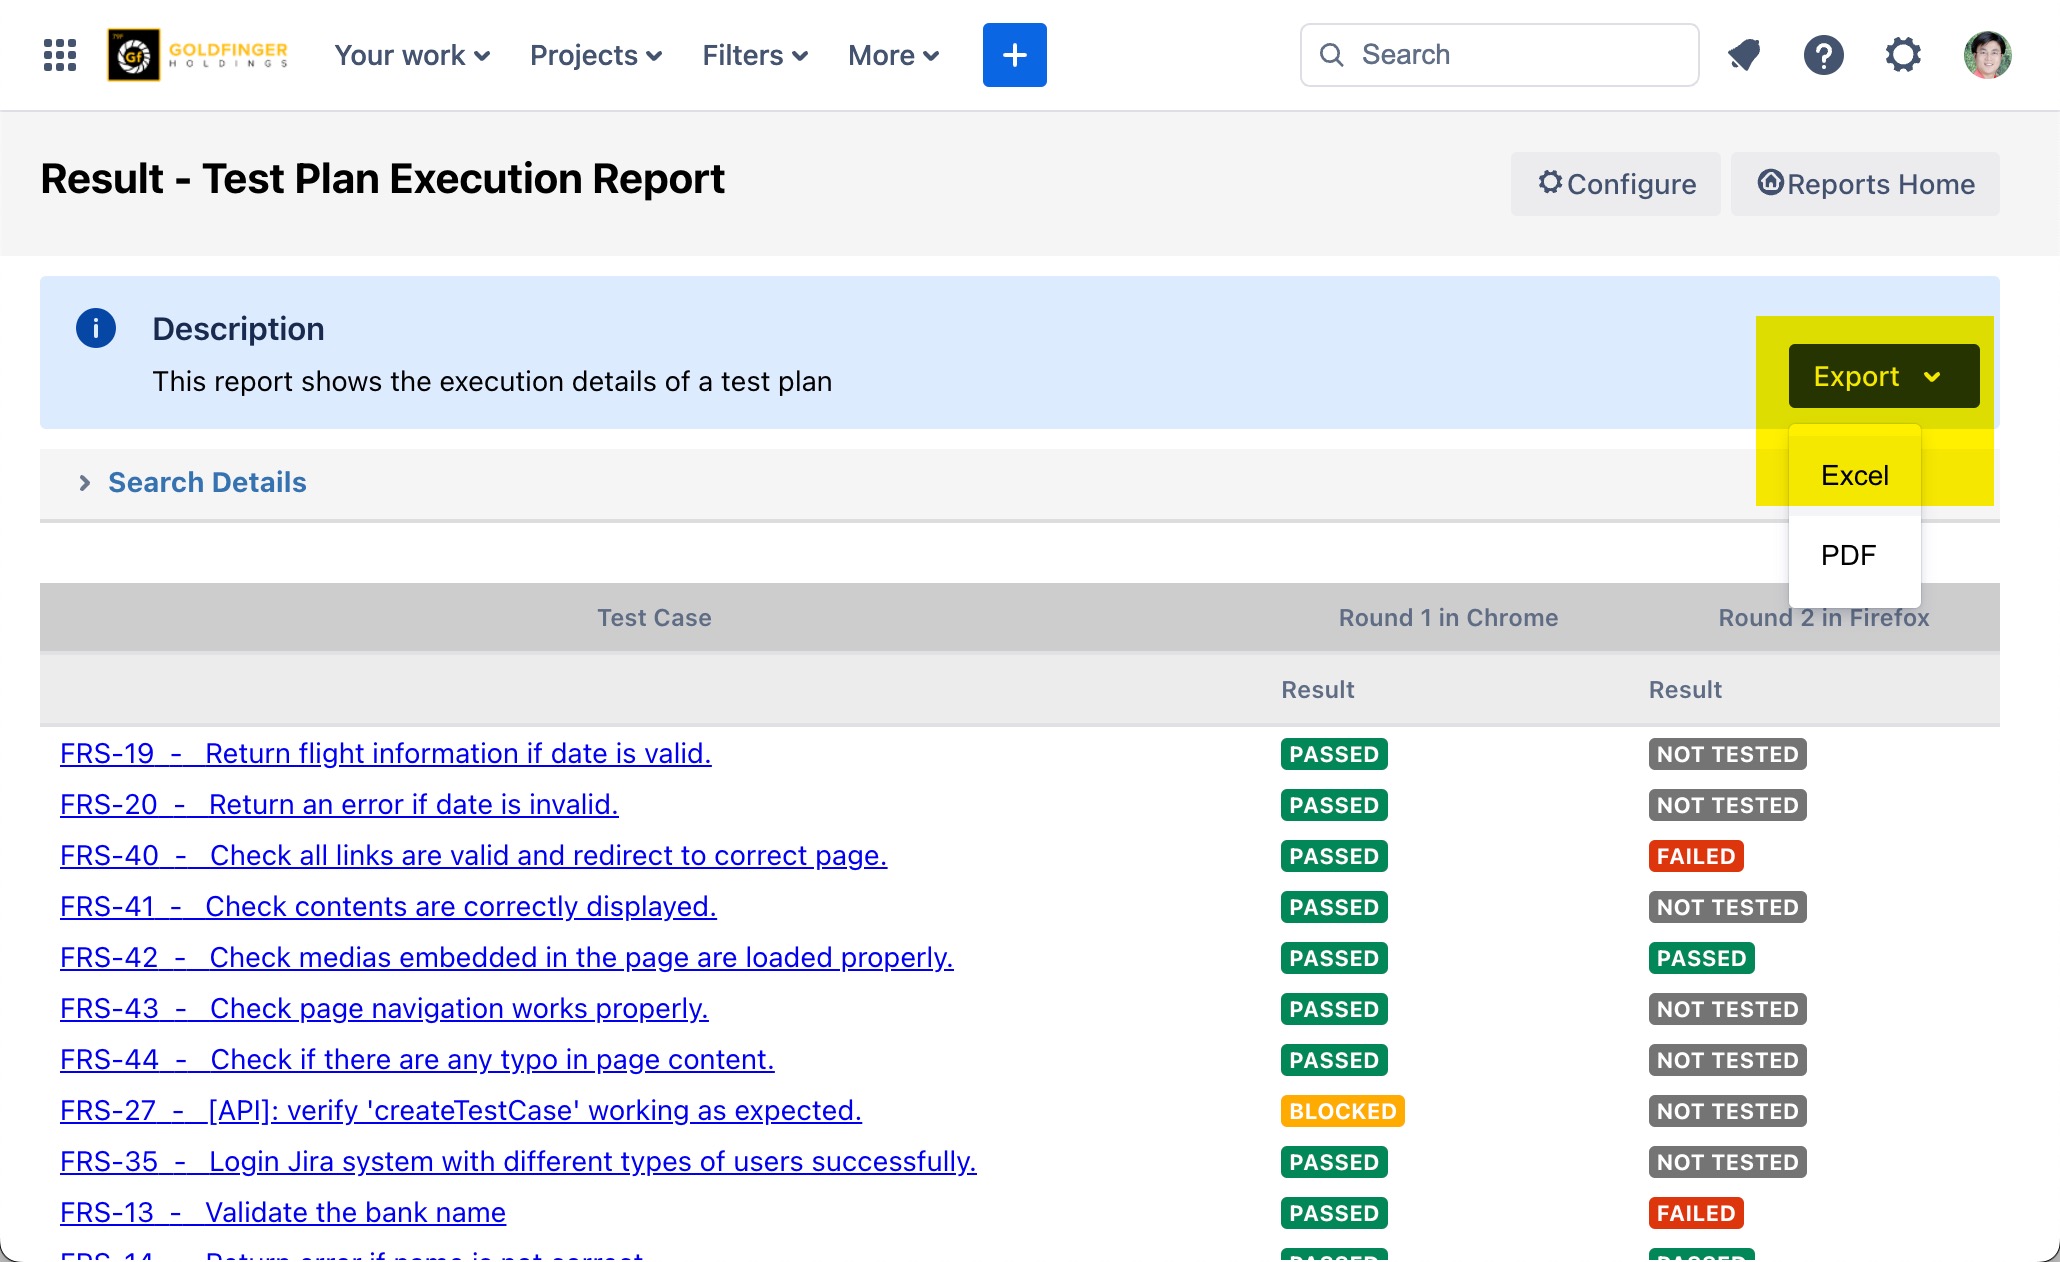
Once a report is generated, user can click “Export” button to export. The report can be in either .xlsx, PDF or Word file for offline usage.
Adding TestRay Gadgets in Jira Dashboard
Note: Dashboard gadgets provide brief testing information.
-
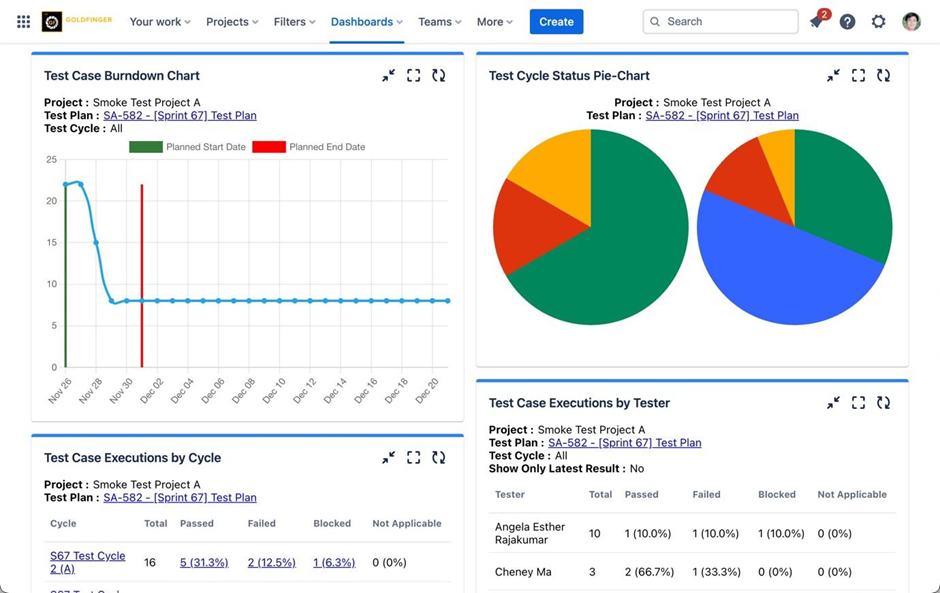
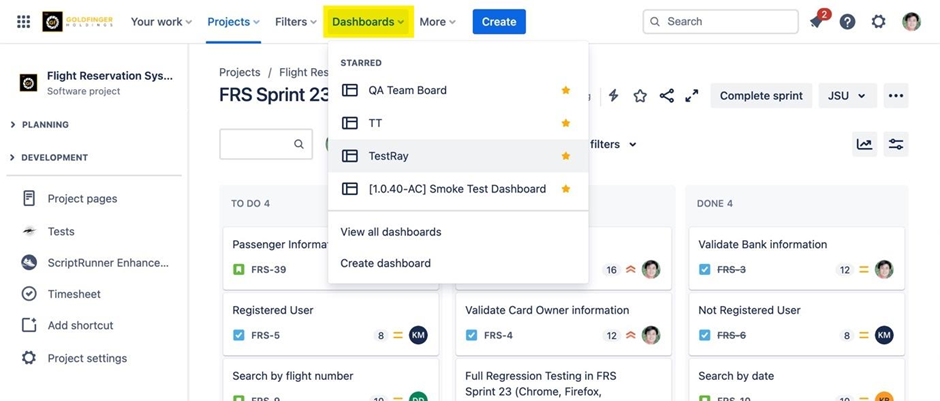
Click the “Dashboard” from Jira main menu and select one of the listed dashboards.
TestRay provides gadgets mentioned below for user selection:
-
Test Cycle Status Pie-Chart
-
Test Case Burndown Chart
-
Test Case Executions by Cycle
-
Test Case Executions by Tester
-
Defect Statistics per Test Cycle/s
-
Test Case Executions by Field
-
Test Executions During a Period
-
Test Run Assigned To Me