.png)
Launching Requirement Issue
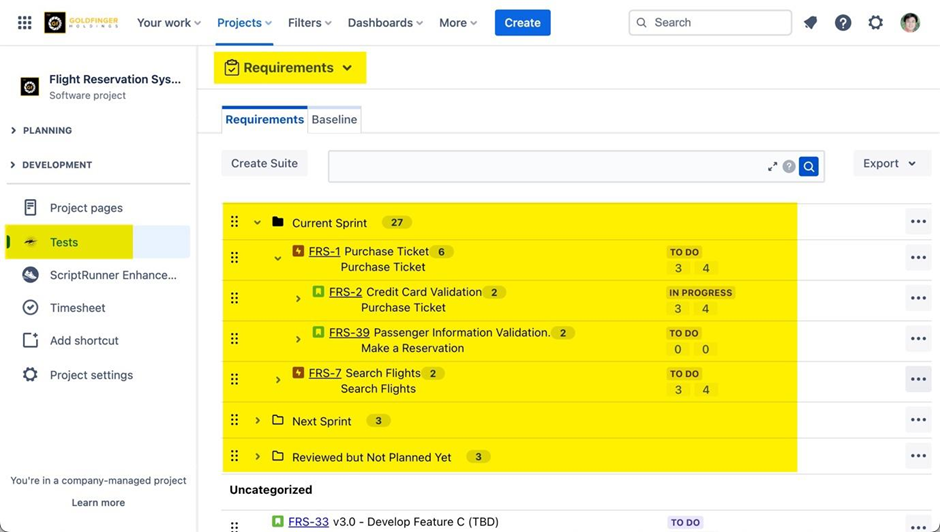
Note: There is a separate Requirements page to categorize all requirements.
-
Navigate to Projects -> Tests -> Requirements. The Requirements page appears.
Creating Requirement
Note: You can map your own issue types to “TestRay Requirement” so that they appear in “Requirements” page.
How to do it please refer to: Global Settings
-
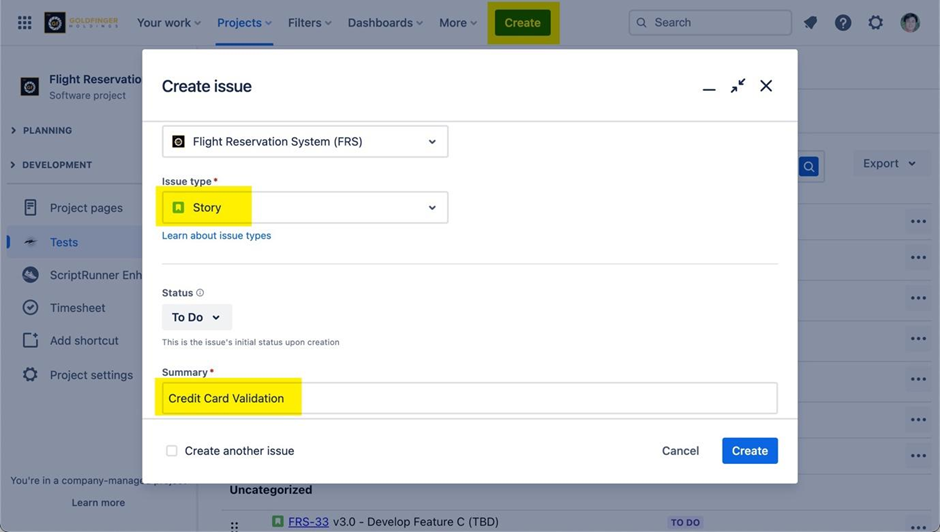
Click “Create”, the “Create issue” dialog box opens.
-
Select the “Requirement” issue type (e.g., Story) from the drop-down values.
-
Enter the summary and other necessary information.
-
Click “Create”, the requirement issue is created successfully.
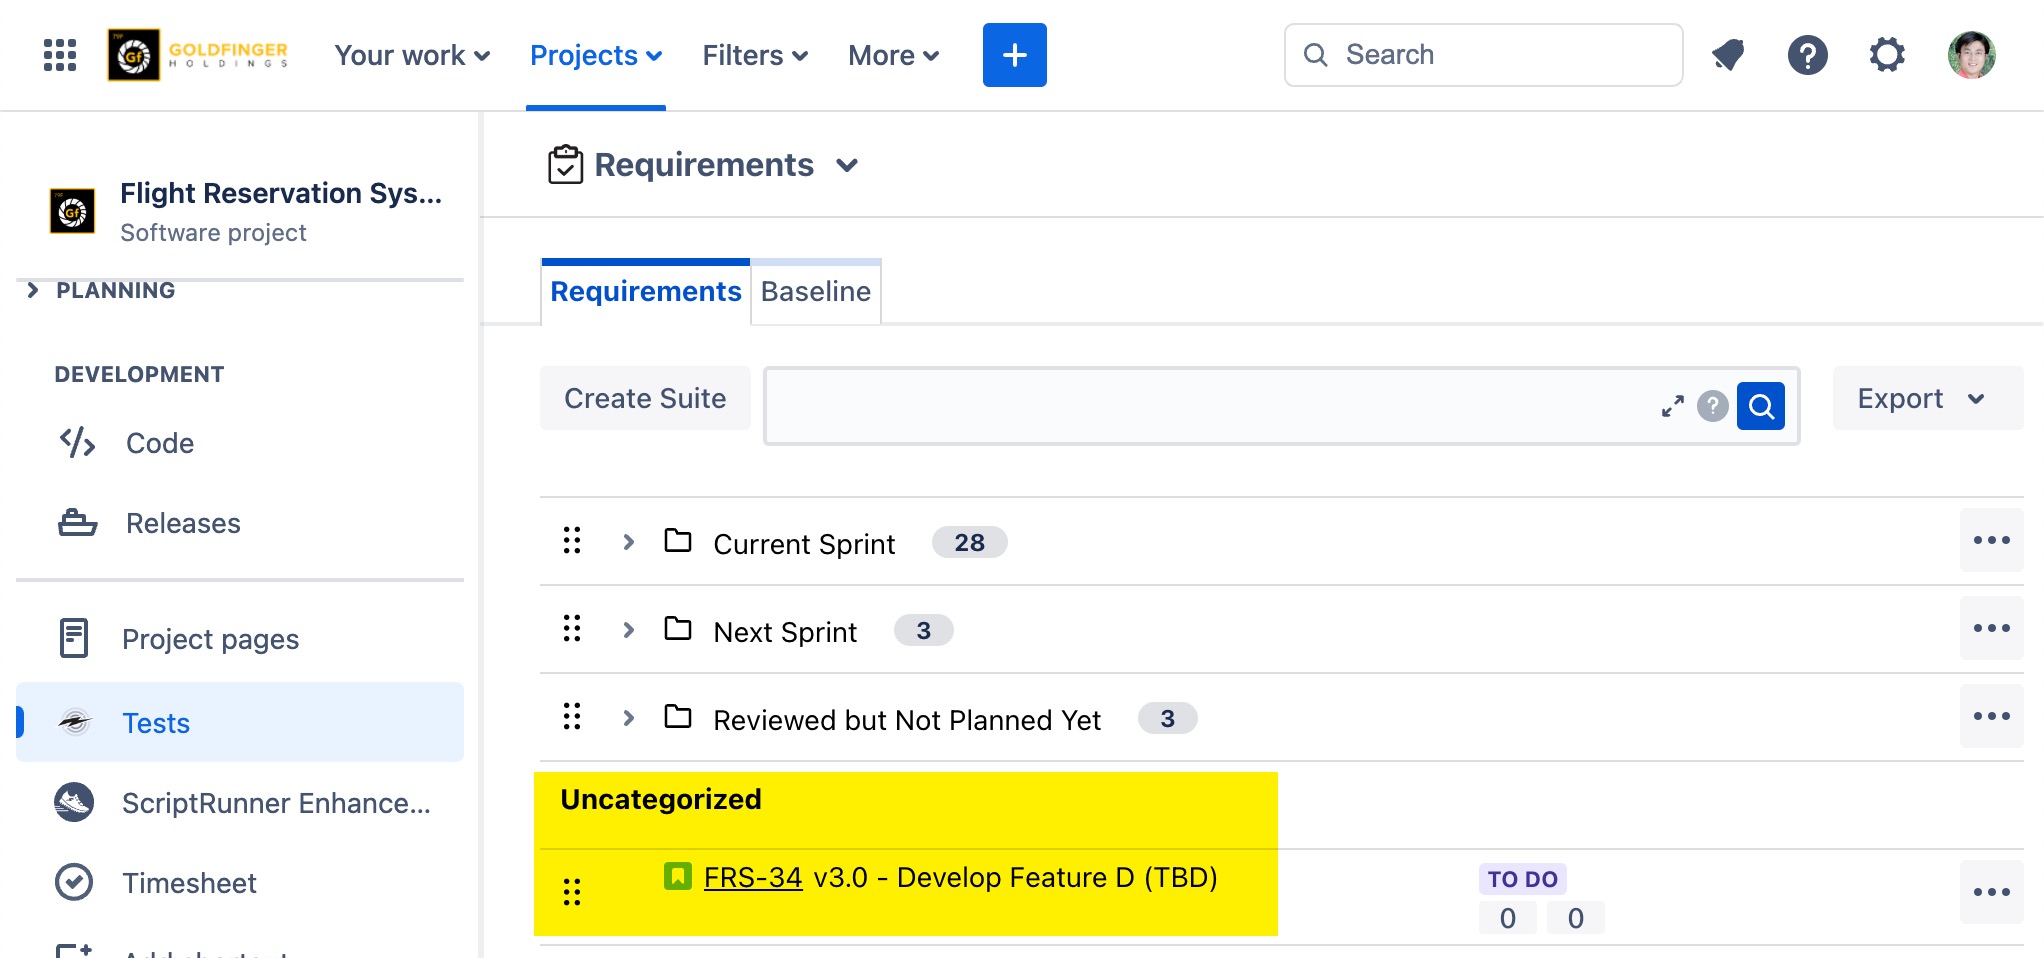
Note: Once the requirement issue is created, it will be listed at the bottom of page, under “Uncategorized” list.
Viewing Requirement Issue
-
Launch the created requirement issue.
-
Check “Requirement Details” panel.
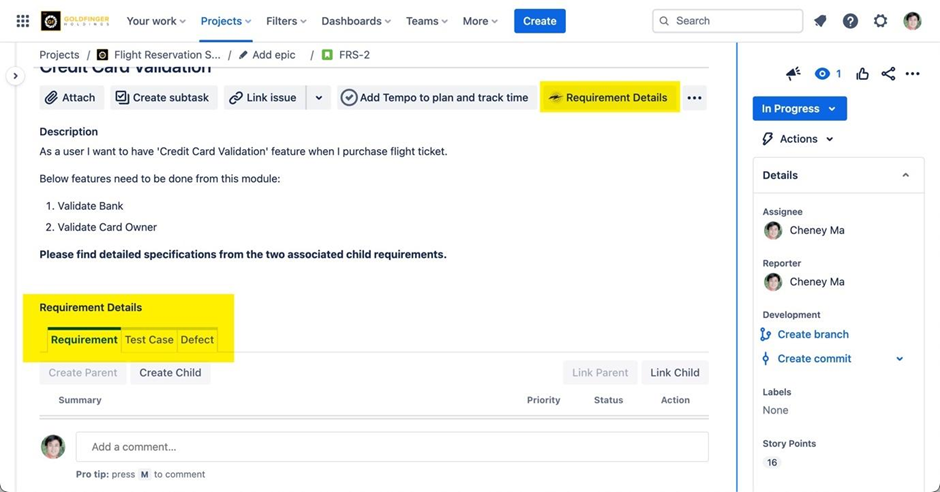
Note: The Requirement panel showing the connections between requirement and test activities (Test Case, Defects), it also shows requirement hierarchy information.
Breaking Down Bigger Requirement into Smaller Pieces
-
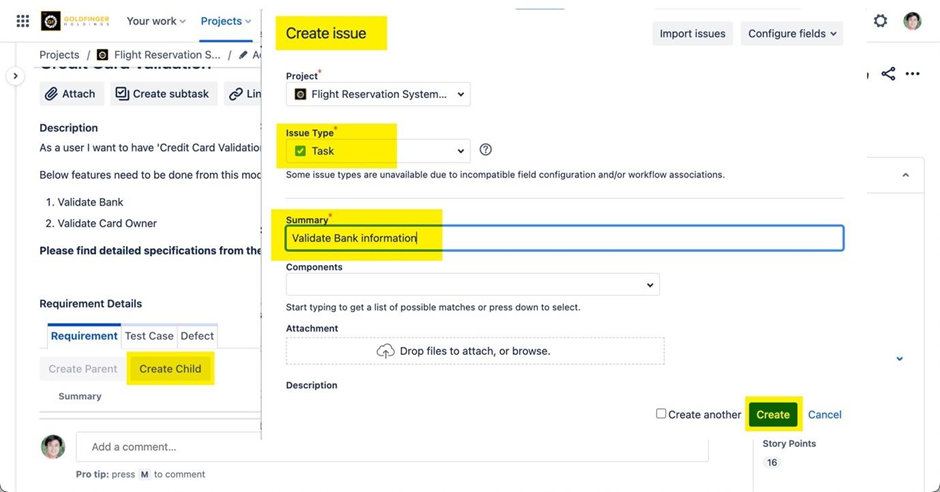
Click the “Create Child” button in the “Requirement Details” section. The Create issue dialog box opens.
-
Choose a requirement issue type (e.g. Task) which will be listed as a child requirement.
-
Enter the summary and other necessary information.
-
Click “Create”, the requirement issue is created successfully.
-
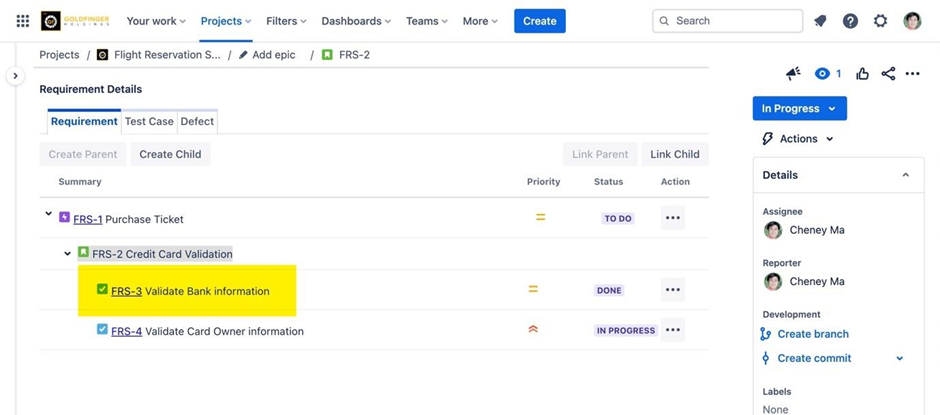
Once a task is created, it will be linked as a child.
-
User also can create a parent by using “Create Parent” button. Existing requirement issue also can be linked by using “Link Parent” and “Link Child” options.
-
Only one requirement issue can be linked as “Parent”.
-
Multiple requirement issues can be linked as “Child”.